Did you know that you can navigate the posts by swiping left and right?
So you want a new site with a FREE SSL Certificate?
11 Feb 2017
. category:
tech
.
Comments
#firebase
#web
#jekyll
It is 2017, you are a developer and you are ashamed of having your personal domain forwarded to an about.me page… if you are like me, you probably want YOUR OWN SITE with your bio, your portfolio, links to your social media profiles, and you want to be able to customize it a bit.
What to do, what to do… let’s think out loud and list at least 3 options:
A. Get hosting from GoDaddy or other traditional hosting provider and set up a CMS like Wordpress… nah, too expensive, and you don’t really want to deal with Wordpress for something simple as a personal website, believe me. Plus, for most sites a CMS is completely unnecessary overhead and only adds complexity and they are plagued with performance problems and security issues you don’t really want to waste your time resolving.
B. Create a full-fledged web app with some programming language and deploy it on heroku… no man, too complicated and time consuming, you just want a simple website.
C. Forward your domain to your tumblr micro blog or other social media profile… hmm… not a really good idea, specially if you want it for professional purposes, plus there is no way to customize them.
Ok, these are just 3 alternatives, and there are some many options out there that you might end up just forgetting about it and keep using your lame about.me page you can’t say you built yourself.
Well, I was in the same situation until I recently found out about static site generators.
Static Site Generators
Static site generators take a different approach and generate all the pages of a website only once and only when there in an actual change. The resulting sites are “rock solid”, you can do all the javascript you want, have no moving parts, no security holes and caching them is easier so they are blazing fast.
There are several static site generators… my rule of thumb for picking third party libraries and other OSS is “always use whatever is more popular” (that way you can find more docs, help, etc… and it won’t probably be an abandoned thing next year), so I decided I’ll go with Jekyll.
Hosting your sites with FREE HTTPS
We all know that the best things in life are FREE and we all love FREE stuff right?
So… how can we get FREE HOSTING for our new static site and even better, with a FREE SSL certificate? As a guy who has used Google products since the early days of GMail and Google Apps, the answer was clear… Firebase Hosting!.
Firebase hosting is ultra fast, has a Global CDN, it has nice command line tools and it has built-in SSL, and yes!, all of this is FREE!
Setting Up Your New Site
Under the assumption you are command line savvy and you have ruby and node installed, we’ll get hands on and create our new static site.
Install (and tweak) Jekyll
Open a terminal and type:
gem install jekyll
jekyll new you-site-folder
cd your-site-folder
Before you build your site for the first time, let’s do an early tweak to jekyll that will help us with Firebase along the road. Open “your-site-folder” using vim, nano, emacs, atom (recommended) or whatever text editor you like to use… and open the “_config.yml” file and add the following line:
destination: "./public"
After you are done with changing the jekyll’s destination folder, execute jekyll serve.
Sweet, we are done setting up Jekyll! Your static site was built inside the “public” folder and you should now be able to see your site at http://127.0.0.1:4000/.
Install Firebase
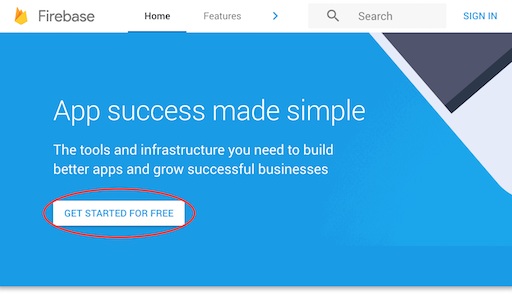
Use your browser to log into Google and to to [Firebase Console][https://console.firebase.google.com/] and click “GET STARTED FOR FREE”.

Then click “CREATE NEW PROJECT”.

Name your project and click “CREATE”.

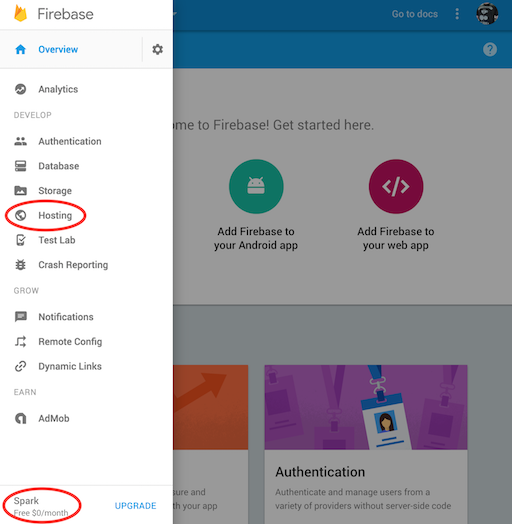
Verify you got the Spark plan (Free $0/month) and click in the Hosting menu option on the Navigation Drawer in the left.

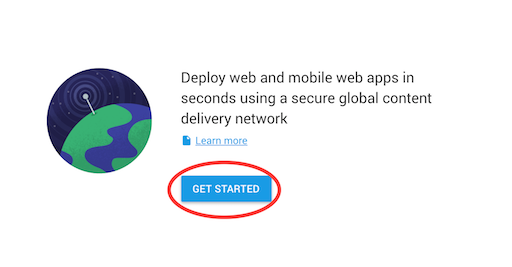
Click “GET STARTED”.

A dialog will show up with instructions similar to the ones below, but I recommend you to follow the instructions on this post because I’ll be mentioning jekyll related stuff.
To install firebase’s CLI, cd yourself into “your-site-folder” and execute sudo npm install -g firebase-tools.
When everything is installed, execute firebase login to sign into Google.
Then, initiate your project by executing firebase init. Follow the prompts and when prompted:
I. Select the “Hosting” option.
II. Select your project.
III. For the database rules, just hit enter. (We are not using it.)
IV. For public directory, just hit enter. (We already told jekyll to build in “public” which is Firebase’s default).
V. Ok… if you want a “single-page” site, type y and hit enter. If you want a custom 404 page, type N and hit enter and a 404.html page you can customize later will be created inside “public”.
VI. Because you already built your site with jekyll there is already a “public” folder, type N and hit enter. If you did deleted the folder, there is nothing to fear as jekyll will recreate everything in there every time you execute jekyll serve.
We’re done setting up firebase! Enter firebase deploy and your site will be deployed to the interwebz! Firebase will give you an URL (https://your-site-something.firebaseapp.com) where you can see your site.
Now, we need to tell jekyll about some files we don’t want it to put in the “public” folder when we build our site again. Open the “_config.yml” file again, find the “exclude” entries and add Firebase’s JSON files.
exclude:
  - Gemfile
  - Gemfile.lock
  - database.rules.json
  - firebase.json
To deploy new versions of your site, just do jekyll serve and firebase deploy.
FREE SSL Certificate
Time to secure our site! Go back to your project on Firebase Console, click “CONNECT A DOMAIN”.

Then follow the instructions, can’t really get into the details because each domain provider has a different UI for this, but the bottom line is that you will have to add some DNS records to your domain settings to prove you own it. Then, just wait a couple of hour while Google detects these DNS records and provisions your SSL certificate.
Voilà! Next time you deploy to Firebase, you’ll see your domain in the Terminal, open it in your browser and enjoy!
Tips
Take your time to learn more about markdown, jekyll and to pick and install the jekyll theme that better suits your needs.
Modify the theme you’ve installed, add your own pages with your own javascript experiments, write your blog posts using markdown, etc… You can do whatever you want as long as the final product is a static site with javascript, CSS and images, and believe me… you CAN DO A LOT with that!
Bonus
In case you are asking yourself… why HTTPS?.
